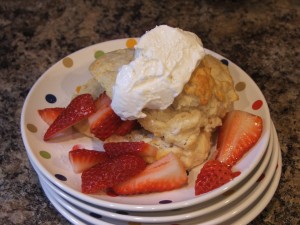
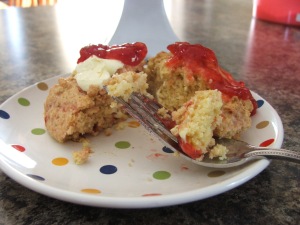
I recently came across a vegan blog I had never seen before and found a most delicious recipe! As soon as I saw it, I knew I was going to make it. Just a few ingredients? Healthy? Dairy-free & Egg-free?? Yes, yes I will. And I'm pretty sure you'll love this, too.
*Use only the solid part of the chilled coconute milk for best results.
I'm linking with some of these parties!
Showing posts with label allergy-free dessert. Show all posts
Showing posts with label allergy-free dessert. Show all posts
Friday, March 30, 2012
Wednesday, January 18, 2012
Easy Apple Dumplings {Dairy-Free, Egg-Free}
I came across a recipe for these delicious apple dumplings a few months ago here and kept thinking about making them, but put it off....until yesterday. Don't let it fool you. Just because it has apples in it doesn't mean it's healthy - but it is SO YUMMY! I tweaked the recipe a little bit to make it less sugary and also make it allergy-friendly. So, here it is!
Easy Apple Dumplings {Dairy-Free, Egg-Free}
1 can refrigerated Pillsbury Crescent Rolls
1 apple, washed and cut into 8 slices {skin still on}
1/4 cup Smart Balance Light (melted)
1/4 cup brown sugar
cinnamon
Preheat oven to 350. Roll out crescent roll dough. Wrap each apple slice in one triangle of dough. Place in a greased pan. Sprinkle cinnamon on top of all the 'dumplings'. Mix melted Smart Balance Light and brown sugar together. Pour over each dumpling. Bake for 25 minutes. Serve warm alone or with Tofutti brand {dairy-free} Vanilla Ice Cream. YUM! (You can double, triple, etc. this recipe to accommodate your needs.)
Thursday, January 12, 2012
Bite-Size Banana Pie {Dairy-Free, Egg-Free, Nut-Free}
One way to make homework seem a little less daunting after school, is to have a spontaneous, fun after-school snack. It's amazing the power food has over us. I try to give my kids fruit most of the time for snacks, and it usually works, but they can get a little tired of plain fruit so every once in awhile I add some variety. If you are not allergic to wheat or soy, Keebler Ready Crust Mini Graham Cracker Crusts are perfect to keep on hand. You can fill them with pudding, fruit, jello, etc. and the kids love them! Today I made these...
Bite-Size Banana Pie {Dairy-Free, Egg-Free, Nut-Free}
Keebler Ready Crust Mini Graham Cracker Crusts
Bananas
Hershey's Chocolate Syrup {the regular one is dairy-free, nut-free}
Colorful Sprinkles
Dairy-Free Whipped Topping {optional}
Fill each crust with sliced bananas, drizzle chocolate syrup over them, top with whipped cream and/or sprinkles. I didn't have coconut milk on hand so I couldn't make my dairy-free whipped topping today, but click for the recipe. Serve immediately!
My kids loved these and it made this cloudy day seem so much more exciting! {Nevermind the fact that they are excited to get to see their Grammy & Papa tomorrow - I'm sure that has nothing to do with their excitement. yeah, right.}
Labels:
after-school snacks,
allergy-free dessert,
banana pie,
bananas,
coconut milk,
dairy-free,
egg-free,
hersheys chocolate syrup,
nut-free,
peanut-free,
sprinkles,
whipped cream,
whipped topping
Friday, December 30, 2011
Feels like Summer...
...and that means the children's stomachs are a bottomless pit. At least that's how they act. So, I've begun stocking up and brainstorming again for healthy snacks for the hungry little people in this house. My goal for this summer {in the food category} is to only have healthy foods on hand for daily snacking. Of course, this dessert-loving mama will always have an emergency sweet treat on hand, but for snacking purposes we're going healthy. This should accomplish 1 of 2 things. Either they will 1) learn to eat and love healthy snacks or 2) they will not ask for a snack every 15 minutes. Either way, it works out good for me. So, this week I'm going to try to post some healthy snack ideas for summer!
Let's start the week with Strawberries!
 Just get some fresh, juicy strawberries - wash them and serve them up with a little packet of Truvia {natural sweetener}. My girls love to put their own "sugar" on their berries and one packet of a natural sweetener works great. There's no guilt or 'accidental dumping of sugar' with the individual packets.
 Make a yummy dairy-free Strawberry Shortcake.
 Make some Strawberry Scones.
Do some fruit kabobs and serve with dairy-free whipped cream!
 Or serve fresh strawberries with this Dairy-Free Chocolate Dipping Sauce {below}:
1/4 cup vegan chocolate chips
1 T Tofutti brand sour cream OR 1 T almond milk
Melt together in a small saucepan or in the microwave at 30 sec intervals. Serve!
Stay tuned for more healthy, but yummy treats for summer!
Let's start the week with Strawberries!
 Just get some fresh, juicy strawberries - wash them and serve them up with a little packet of Truvia {natural sweetener}. My girls love to put their own "sugar" on their berries and one packet of a natural sweetener works great. There's no guilt or 'accidental dumping of sugar' with the individual packets.
 Make a yummy dairy-free Strawberry Shortcake.
 Make some Strawberry Scones.
Do some fruit kabobs and serve with dairy-free whipped cream!
 Or serve fresh strawberries with this Dairy-Free Chocolate Dipping Sauce {below}:
1/4 cup vegan chocolate chips
1 T Tofutti brand sour cream OR 1 T almond milk
Melt together in a small saucepan or in the microwave at 30 sec intervals. Serve!
Stay tuned for more healthy, but yummy treats for summer!
Strawberry Shortcake and Whipped Cream {Dairy-free, Egg-free}
I love a good strawberry shortcake. It makes me think of summertime and running around barefoot in the grass at my mamaw's house when I was growing up. She and my papaw lived in the country. Technically, it was Knoxville, but it was rural Knoxville. When we took the 'back way' (aka - curvy, country roads) to get there, we would pass lots of farmland, cows, an old one-room schoolhouse, several very old dilapidated wooden houses and drive over lots of hills that take your breath away. I don't know if she ever made us strawberry shortcake, but this summer dessert brings back these memories of my childhood summers.
This has to be one of the easiest desserts to make and it is a crowd pleaser. To make it dairy-free, follow this recipe!
Strawberry Shortcake {Dairy-free}
4 cups sliced fresh strawberries1/2 cup sugar {or less - you could even use Agave Nectar or Stevia instead}
2 1/3 cups Original Bisquick mix
2/3 cup Almond milk
3 T sugar
3 T Smart Balance LIGHT buttery spread, melted {only the LIGHT version is dairy-free}
Dairy-free Whipped Cream {see below}
Mix strawberries and 1/2 cup sugar; set aside. Heat oven to 425 degrees.
Stir Bisquick mix, milk, 3 T sugar, and butter until soft dough forms. Drop by 6 spoonfuls onto ungreased cookie sheet.
Bake 10-12 minutes or until golden brown. Split warm shortcakes; fill and top with strawberries and dairy-free whipped cream. Makes 6 shortcakes.
Dairy-Free Whipped Cream {this recipe taken from here.}
2 cans of coconut milk full fat1 cup powdered sugar
Place your cans of coconut milk in the refrigerator for a minimum of 24 hours. The longer the better. So when you bring them home from the grocery store just tuck two into the ice box for when you need emergency whipped cream.
Also, place your bowl and whip into the freezer for at least 3 hours to chill. I use my son’s Kitchen Aid mixer with the balloon whip.
Once you take your bowl and whip out of the freezer and set up the mixer do not waste time. You need to keep the equipment cold. Open the cans at the bottom with a bottle opener to drain off the coconut water. Save this it is great for smoothies. Now open the top of the can all the way and scoop out the thick cream.
Start your mixer on low and move up 1 or 2 notches for speed until you get to moderate. As it starts to whip and increase in volume, gradually add in the powdered sugar. Once it’s mixed and looks fluffy like whipped cream, well you now have whipped cream. Tip from J.C.- look for the beater to leave light traces on the surface of the cream.
Subscribe to:
Posts (Atom)


